

I have to admit, I barely feel qualified to be talking to you about junk drawer organization. I mean, I only got mine under control about two weeks ago.
And, it was at least my 900th attempt at organizing it.
The first 899 failed. Miserably.
But, I’m feeling really great about attempt number 900. It’s been almost two weeks and things look exactly as organized as they did on the day I organized it, so that’s promising. Right?!
We’ve all got a ton of clutter floating around our house, and it can be hard to find a good storage system for it. Most of us end up with a kitchen junk drawer.
Sometimes it’s not in the kitchen – sometimes it’s in a home office, or your nightstand, or the a desk drawer, or the bathroom drawers. But, most houses have it, right?!
A junk drawer is essentially just a giant dumping ground for all of the random small items around your house. Things like office supplies, medicine, glue, gum, push pins, receipts, flashlights and basically any other random miscellaneous things around your home that you need easy access to.
In theory, it’s a great way to organize all of your loose pencils and batteries and other general mess that could otherwise be all over the house. But in practice, it’s so hard to stay on top of it! I’m on a big mission to declutter and organize this year, so I’m tackling my house one drawer and closet at a time. The junk drawer finally got taken care of a couple of weeks ago and ohhhh man, it feels good.
I specifically wanted to wait to tell you about my junk drawer organization project until I had a chance to live with it a while. We’ve already made a few tweaks since I first did it, to make sure it works for us as long as possible.
I feel really (really!) great about where we’re at now. I’m feeling very hopeful that this junk drawer organization system will actually stick, so it’s time to tell you all about it.
junk drawer organization: what i did
First of all, let’s kick things off with a peek at how my junk drawer looked when I started.
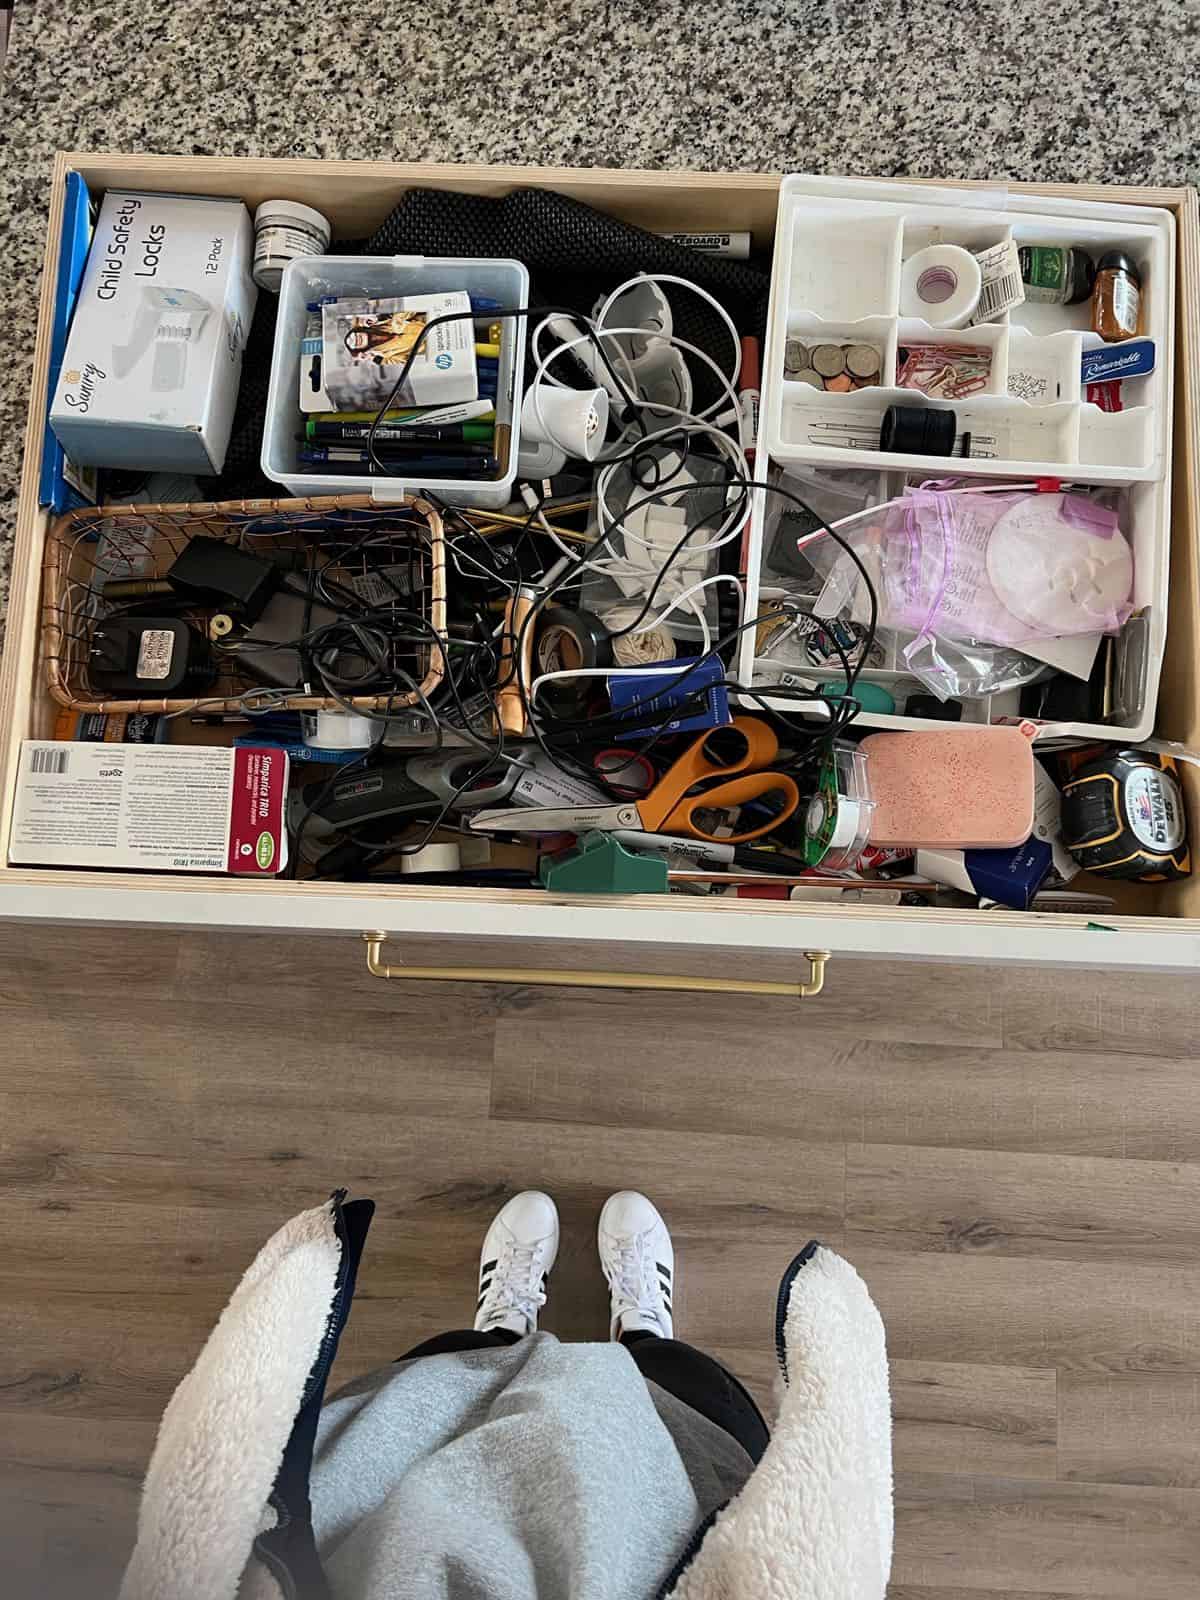
OH MY.
It was bad.
I had attempted to organize it about a year ago, but I committed one fatal error.
I didn’t purchase anything.
I’m learning one thing about myself is that if I try to “make it work” with organization systems and tools I already have in the house, my organization project is doomed to fail.
But, if I take the time and invest a little bit of money into bins and organizers specifically for the space I’m working on? It’s a totally different story.
So, this year I’m really investing time and money into getting some systems set up around our house, and I think it’s gonna work this time.
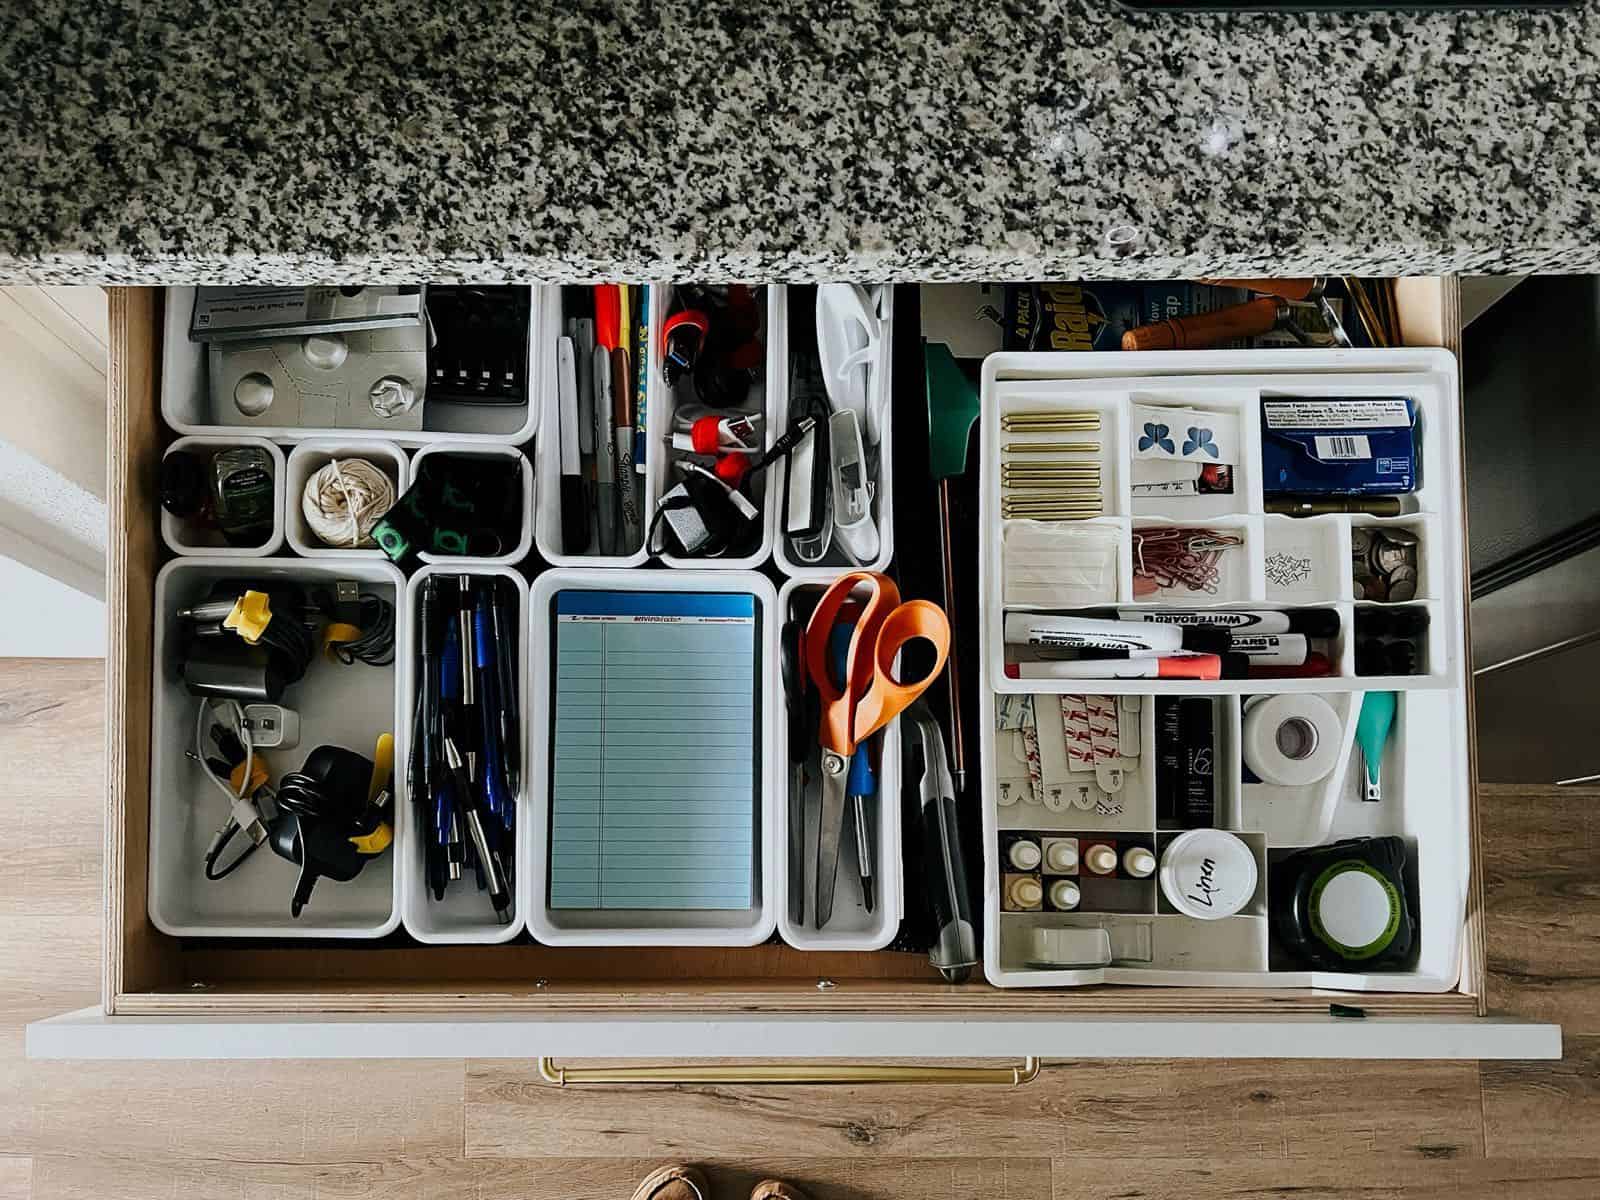
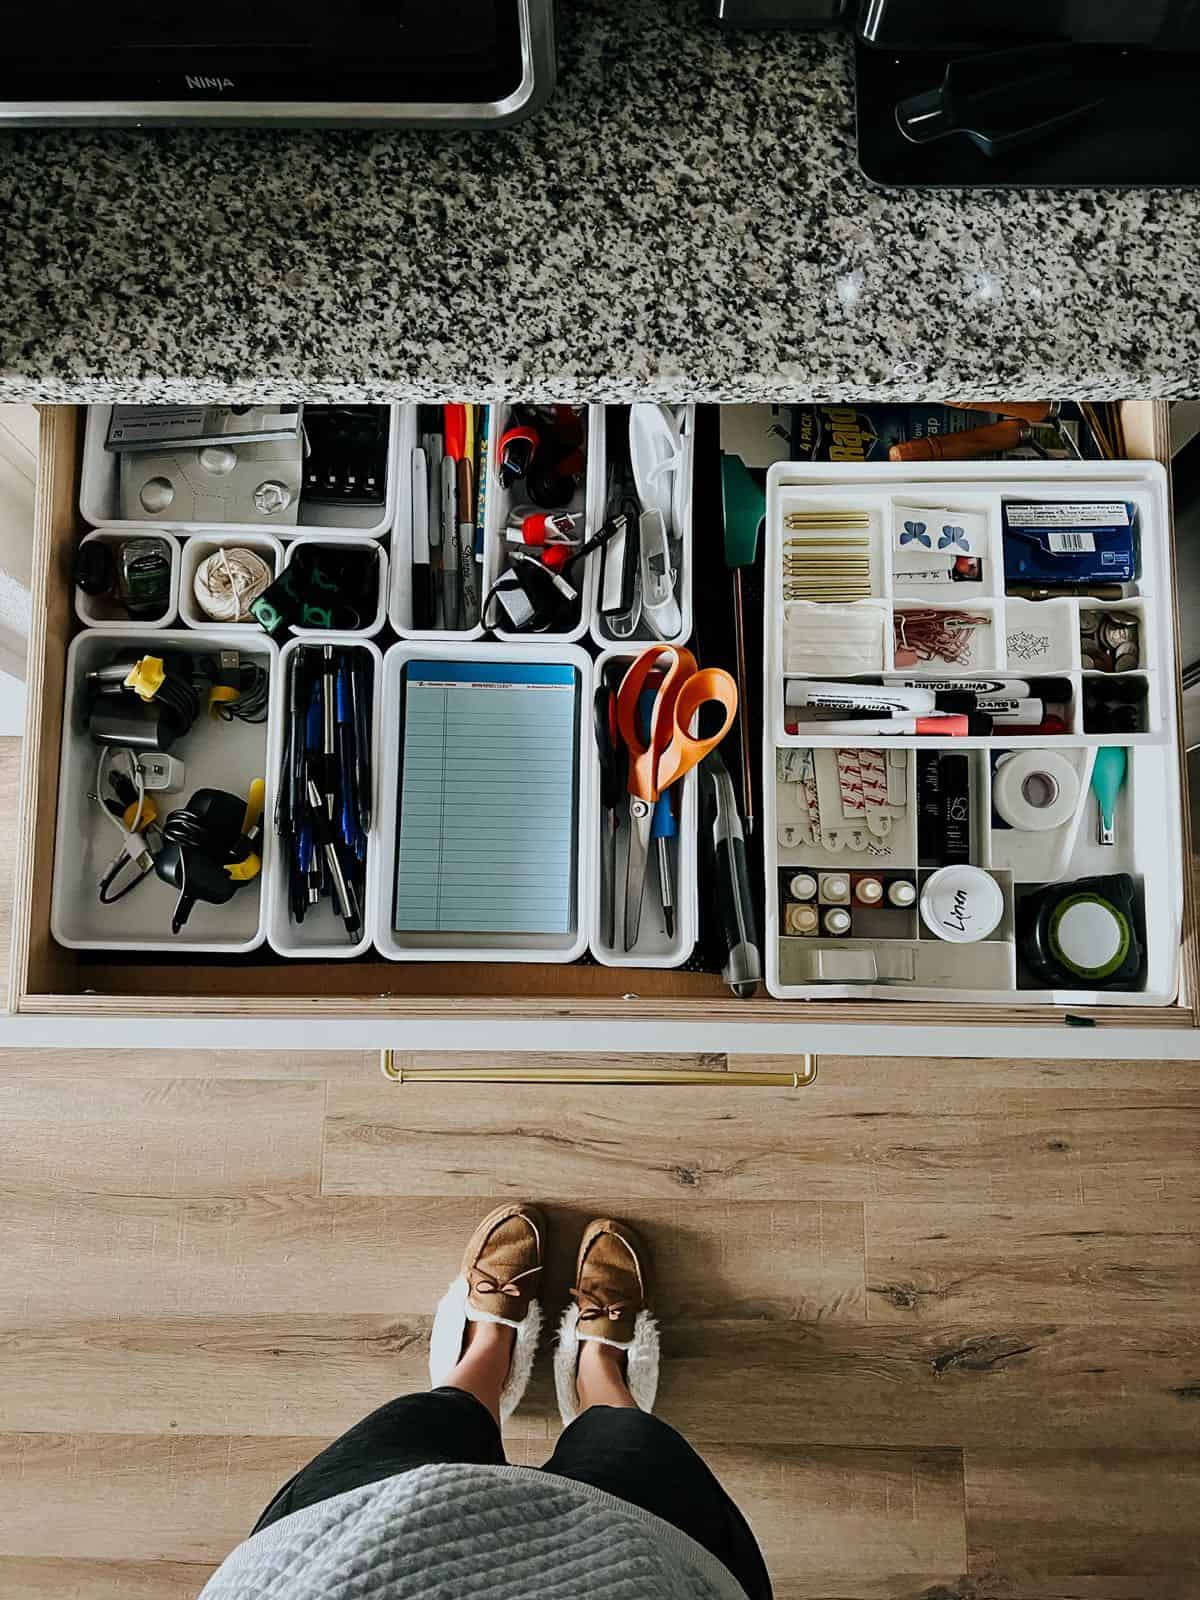
my drawer organizers
The first thing I actually purchased a while back for my junk drawer – it’s a two-tier junk drawer organizer (linking a similar one because I can’t find mine anywhere) and it’s a really great thing to have on hand to organize a junk drawer.
This houses so much of the random things that we rarely use but need quick access to when we do want them. Like candles, rubber bands, stamps, random keys, loose change, paper clips, and hem tape. You know, the things that you don’t need all that much, but you need to know where they are when it’s time to use them!
It’s amazing how much of a work horse that little thing is, and it has really helped keep a lot of things under control for me.
For a while, it was all I had. I figured I could just toss a couple of baskets into the other side and hope for the best.
That didn’t work.
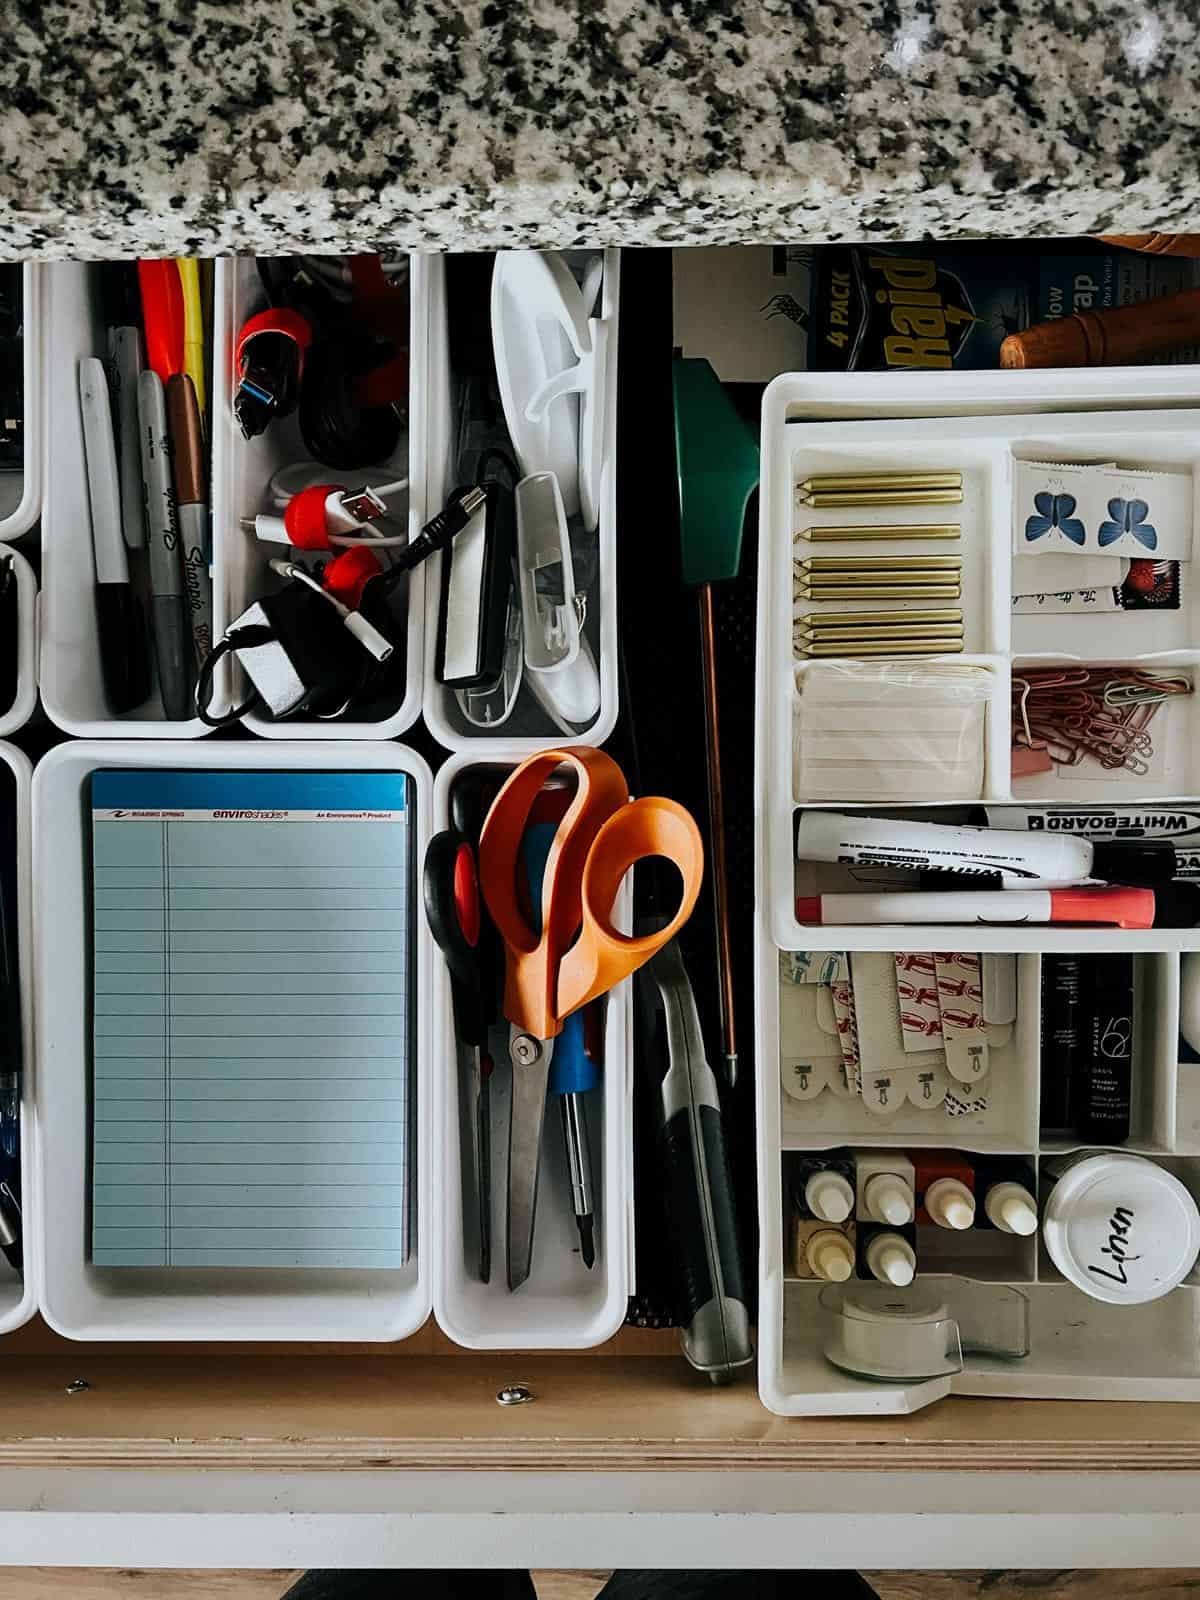
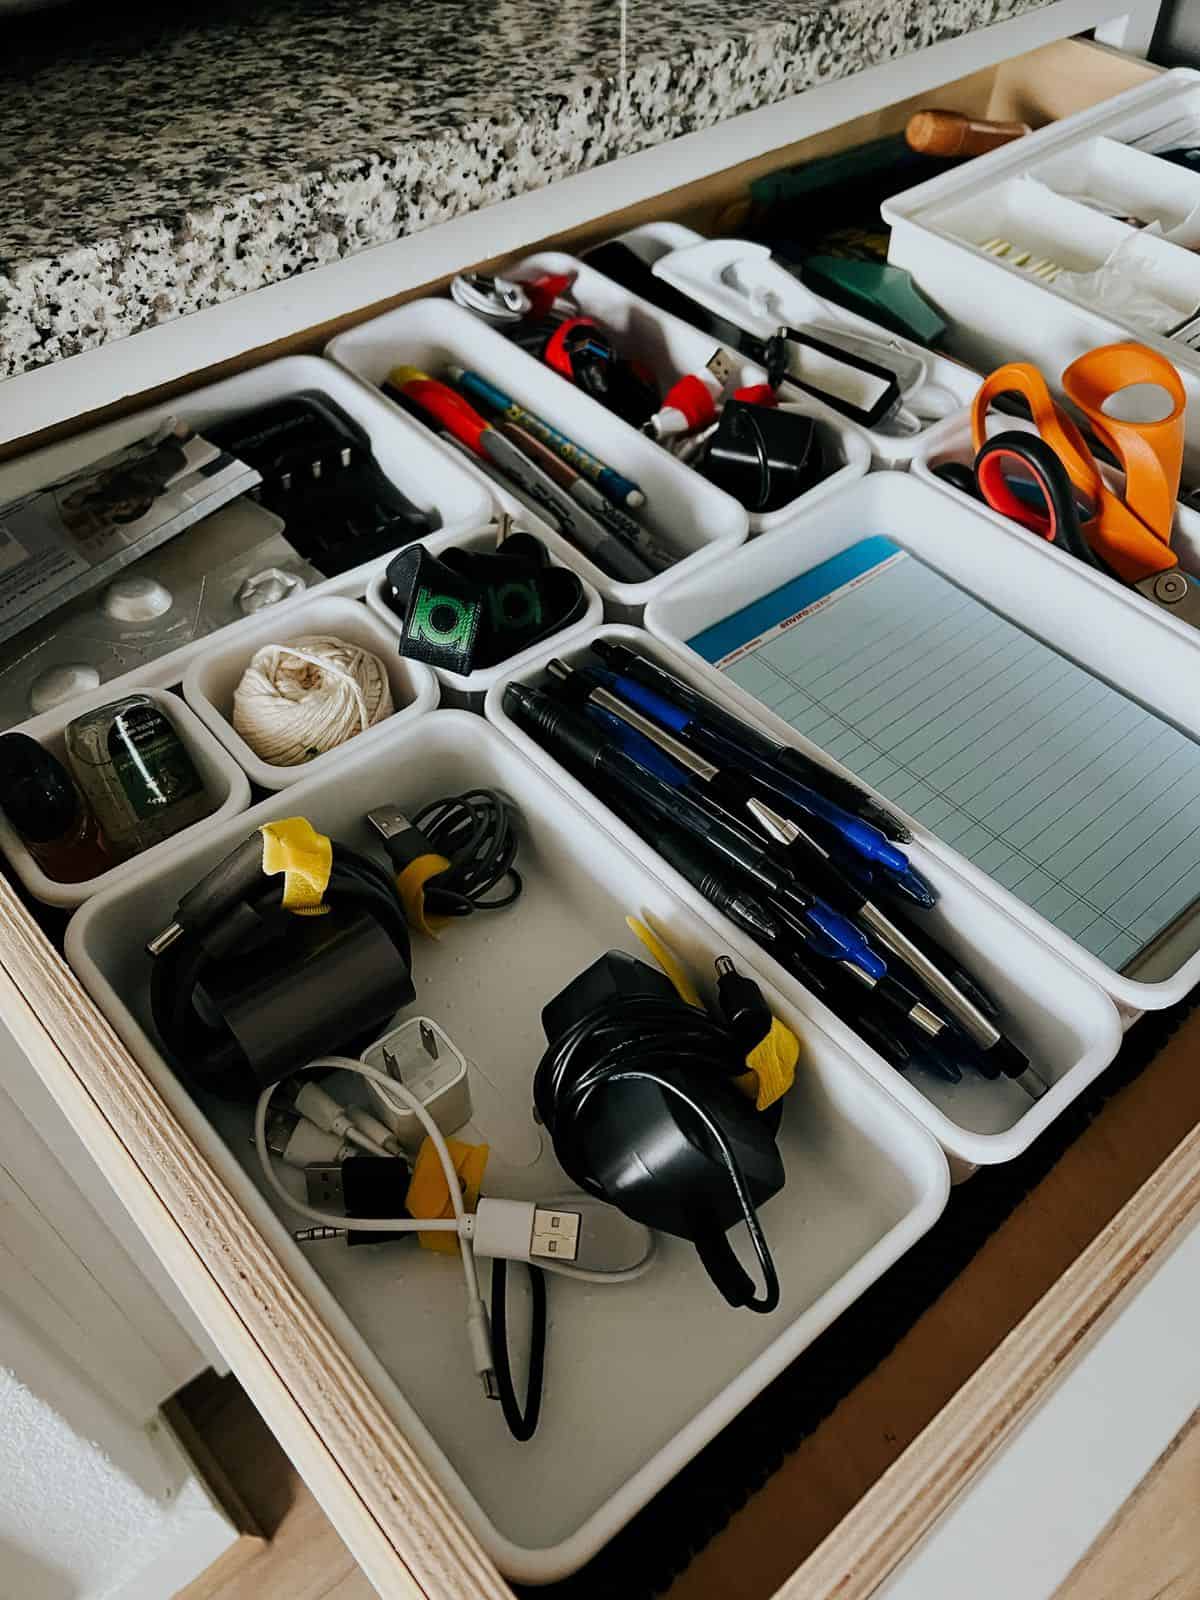
So this time around, I bought these interlocking drawer organizers. I filled the entire drawer with them. Literally. There is only a couple of verrrrrry small sections of the drawer that don’t have a bin in them. That was very intentional – because with a drawer totally full of bins and organizers, everything has a place!
I have a bin for pens. A bin for permanent markers. I have a bin for our pool key. A bin for Command hooks. I have a bin for scissors.
There is a bin for eeeeevery single thing that needs to go in the junk drawer.
And that, my friends, is going to be my secret to keeping things organized.
It’s simple. A place for everything and everything in it’s place, right?!
But, that’s a principle I seem to forget when I’m trying to save money and “work with what I have”. No longer. I’m gonna drop the $20 on the dang drawer organizers and do it right!
Junk drawer organization tips
Here’s the step-by-step process I followed when I was organizing my junk drawer:
- Empty out the entire drawer. Everything. Dump it on the counter.
- Clean out the drawer and install a drawer liner. Bonus points if it’s anti-slip to help keep everything in place!
- Fill the drawer with your organizers. Don’t do everything yet, because you’ll likely want to change it up. I filled about 75% of my drawer to start and left the last 25% for later in the process.
- Create piles of categories – group all of the items together, and be sure to throw away any trash!
- Start placing your items back in your organizers. Group like items together and try to think about how you use the drawer. For example, I’m constantly grabbing the tape measure out of here. So, I need it to be near the front and easy to grab. I don’t use other things as often, so they can be a little harder to reach.
- As you work, be sure to toss anything you don’t need, or relocate things that don’t belong.
- Continue working until the drawer is full and you don’t have anything left on the counter.
- Now here comes the most important part: live with it for a while and adjust! It’s almost impossible that you’ll get it right on the first try. You just won’t. So, be sure to make tweaks and changes as you notice pain points over the next few days.
Done and done!
drawer organization tools
Now, let’s talk about the tools you might need to get this job done.
Because, remember, if I’ve learned anything, it’s that you won’t regret spending a little bit of money on organizers specifically for your space!
I used:
- A two-tier organizer
- These bins
- These cord wraps (LIFE SAVER for things like chargers!)
- I added a set of these notepads since we’re always looking for paper and they fit perfectly in the larger bin
This was perfect for my drawer. But, if you have other needs, you might need slightly different systems. For example, you may prefer to use a tray instead of a bin. I used plastic bins, you might prefer to use bamboo or acrylic. Or a larger bin with small compartments. You might want to use drawer dividers instead. Heck, you might prefer to make your own out of cardboard! I’d recommend measuring the width and depth of your drawer before purchasing, so you can maximize your storage!
I’ve been gathering TONS of drawer organizer ideas on Amazon (so I can organize EVERY DRAWER IN MY HOUSE), and I put together a list for you.
Click here to see a huge collection of junk drawer organizers to get you started!
Other organization projects you may love
- DIY Flatware drawer organization
- Art closet organization
- Organizing our pots and pans
- Spice drawer organizer
The post Junk Drawer Organization: Tips & Tricks appeared first on Love & Renovations.